Photobucket Photobucket Photobucket Photobucket PhotobucketPhotobucket Photobucket Photobucket

Wednesday, October 31, 2012

Happy Halloween 2012

Happy Halloween!  
I love, love, love Halloween and for lots more reasons than dressing up and eating candy.   Three years ago today Mr. Darling and I were engaged! I hope you have an incredibly spooky Halloween with costumes, good food, and some candy too!


What is your favorite thing about Halloween? 
 
Photobucket

Monday, October 29, 2012

Miso Noodle Soup

(Here in PA we are hunkered down waiting for Hurricane Sandy to come.  Right now we have rain and a little wind but, they are calling for fierce wind, flooding, and power outages.  Thinking of everyone on the coast and anyone else affected by this storm, here’s to hoping everyone stays safe!)

 
In college one of my favorite fast (i.e. packaged) “meals” was Undon Miso Soup.  Now, since I try to avoid anything package I haven’t eaten this soup!  How silly is that, it is so easy to make.   When I’m trying a recipe for the first time I search around for  inspirational recipes and then I make my own!  The best place to go for inspiration, Pinterest of course!  (Check out my Real (yummy) Food board for more inspiration. ) I found and pinned a yummy looking Miso Soup recipe from Flourishing Foodie.  I used her recipe as inspiration and made my own Miso Noodle Soup. 
 Miso Soup is one of my favs and is said to make a healing soup.  Miso is a complete protein that is high in antioxidants and B vitamins.  I’ll talk more about the healing affects of Miso  when I share with my “Hearty Healing Soup.”  It is important to purchase a quality Miso to avoid genetically modified ingredients.  For those of you who avoid soy there are good soy-free Misos available, in fact this soup is made with soy-free Miso.  Additionally, it can be difficult to find a gluten-free Miso. Beside the likelihood of gluten ingredients, the starter culture Koji, is often barley.  I have found and love South River Miso, they have eight varieties of Miso with no gluten ingredients.

It is a high quality, organic Miso. A word of caution for those who eat GF, their "gluten free" Misos are made on the same equipment as the gluten varieties.  They are never made at the same time and the equipment is washed between batches. You can read more at South River Miso.   So far I have not had a problem, as always use at your own risk.  If anyone knows a different Miso that is GF I would be very interested to know! 

Other ingredients include garlic, mushrooms, carrots, scallions, and green beans from our CSA basket, you could sub snow peas for the beans and it would be equally delicious.   


Baked tofu adds heartiness to this simple soup. I started by slicing and pressing the tofu for about 30 minutes.  Then I diced it into bite size pieces and covered with a little extra virgin olive oil, Bragg Amino Acids, and lemon juice.  Then I baked it at 375 F for about 20-30 minutes (stirring halfway through) until the tofu is tender but crispy and lightly browned on the outside. 

 
You can add the tofu directly to the soup but I like the bit of crispiness baking gives the tofu. 
I sauteed the carrots and garlic in extra virgin olive oil until golden, added the rest of the veggies, broth, and water.  Allowed the soup to simmer for about 30 minutes until the veggies were tender.  Then I added cooked rice noodles.


For the noodles I used Pad Thai rice noodles. These are easy to find in your grocery store’s Asian food section. Many are gluten free but be sure to check, I used Annie Chung’s Pad Thai Rice Noodles.  
When the soup is almost finished it’s time to add the Miso.  I put a few ladles of broth in a measuring cup because I didn't want to dirty more dishes!

Then I put 4 tablespoons of Miso in the bowl and stirred to combine.  It was pointed out by one of my darling readers Mary H.  how important it is to mention you never want to boil Miso as it destroys the beneficial microbes in the paste.   


This mixture was added back to the soup and then Mr. Darling and I gobbled up a couple bowls (of soup, we didn't eat bowls haha)!

This is a perfect soup for a cold day!
Miso Noodle Soup
gluten free, vegan, vegetarian, dairy-free, egg-free
 
14 oz firm tofu
5-6 ounces cooked rice noodles
8 oz mushrooms quartered
3 cloves garlic minced
4 carrots diced
1.5 cups fresh green beans diced
1.5 cups scallions thinly sliced
3-4 tbsp Chickpea Miso (substitute another light Miso if you like)
4 cups vegetable broth
4 cups water
3 tbsp Bragg Amino Acids (soy sauce or another alternative)
1 tsp turmeric
Pinch red pepper flakes
Extra virgin olive oil
Juice of half a lemon
Pepper to taste
 
Directions:
 
1.)    Press tofu slices for 30 minutes, dice into small bite size pieces, cover lightly with olive oil, juice of half a lemon, and pepper, bake at 375 F for 20-30 minutes (stir halfway through) until lightly browned. 
2.)    Meanwhile, saute the garlic and carrots in 1 tbsp olive oil until golden.
3.)    Add the remaining vegetables, broth, water, and Bragg.  Bring to a boil, reduce to simmer, and let simmer, covered 20-30 minutes until veggies are tender.
4.)    Reduce the heat to low, add in the baked tofu and cooked rice noodles, stir to combine. 
5.)    Ladle about ½ cup of broth into a small bowl, to it add 3-4 tablespoons Miso and stir to combine.
6.)    Add the Miso mixture to the soup and stir to combine.  Taste and adjust seasonings if necessary. 
Note: I do not add salt to this soup with the broth, Bragg, and Miso I feel it is salty enough, if I do feel it needs more salt I add a little more Bragg.    
7.)    Serve and enjoy!!
 
A hot bowl of Miso soup is perfect for warming you up on a cold, rainy day.  Here’s to hoping it keeps Mr. Darling and I warm as Hurricane Sandy passes. 
 
 
Photobucket
 
Linking up with:

Monday, October 22, 2012

Veggie Style Mexican Chili

Isn’t it funny how the smell and taste of food can bring about vivid memories?   For me, the smell of celery and onion reminds me of my Mom and Grandma preparing Thanksgiving dinner and Mexican food reminds me of college taco nights with friends.  In college my roommates and cross country teammates and I had taco night at least twice a month.  It always involved a ton of tacos, tortilla chips, salsa, and guacamole.  And although the tacos we ate then are vastly different than any I would make now, cooking Mexican food still makes me want to invite friends over for dinner!  Since then my idea of Mexican has broaden and I’ve learned it can also be healthy (not like the greasy tacos of my college days!)  This delicious and healthy Mexican Chili is my take on taco soup.  Let’s start with the yummy ingredients. 

 
Onion, jalapenos, peppers, corn, and beans in a spicy tomato broth make a hearty Mexican chili.  Toppings like olives, green onions, lime, and avocados cool down the spice and make it extra delicious.  This spicy, hearty, healthy chili is the perfect meal to invite friends over for dinner on a cold evening. 
 Mexican Chili
Gluten free, Vegan, Vegetarian, Dairy-Free, Egg-Free, Soy-Free
1 tbsp extra virgin olive oil
1 large onion diced
1 large green pepper diced
2 cloves garlic minced
1 jalapeno, seeds removed, diced
2 cups cooked kidney beans – equals one 15.5 ounce can
2 cups cooked black beans –equals one 15.5 ounce can
2 cups fresh or frozen corn
1 14.5 ounce can diced tomatoes
1 14.5 ounce can tomato puree
4 cups veggie broth
Spices:
2 tbsp chili powder
1 tbsp cumin
1 tsp paprika
1 tsp salt
1 tsp pepper
½ tsp onion powder
½ tsp garlic powder
½ tsp oregano
¼ tsp red pepper flakes
¼ tsp cayenne
 
Toppings:
green onions
olives
avocado
fresh lime juice
you could also use:
shredded cheese (vegetarian) or vegan cheese
cilantro
diced tomatoes

 
Directions:
1.)    Sautee onion in the olive oil over medium heat until golden.
2.)     Add garlic and sauté for about a minute more.
3.)    Add green and jalapeno peppers and sauté for about 3-5 minutes.
4.)    Add veggie broth, tomatoes, beans, corn, and spices.
5.)    Bring to a boil, reduce heat to low and simmer, covered for 20 minutes or until the veggies are tender. 
6.)    Serve in individual bowls with toppings and a side of tortilla chips and salsa. 
 
 
Do you get all nostalgic over Mexican food like I do, if not, what foods bring up good memories for you?  And what is your favorite, healthy Mexican food?
 

Monday, October 15, 2012

Bow's Story & The 13 Project

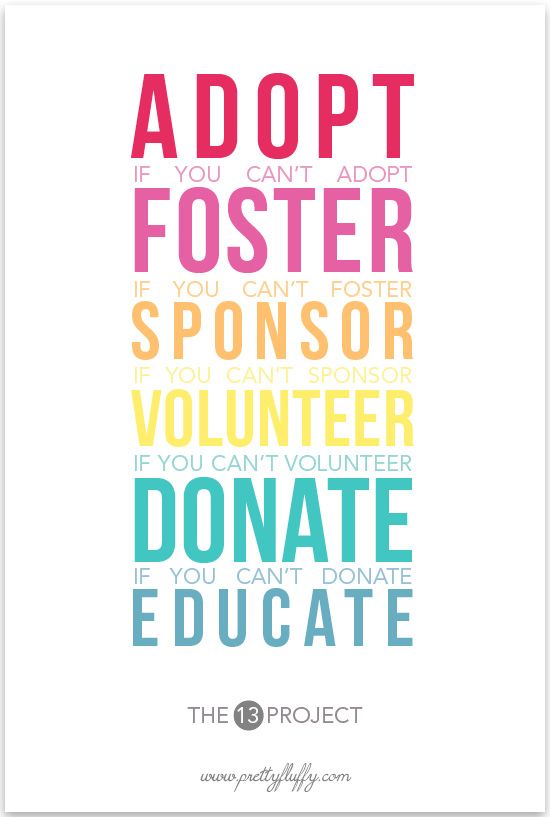
Last week Ashli from the Mini Manor Blog wrote a post about The 13 Project from Pretty Fluffy.  I thought it was awesome so I decided to join in the fun!  Serena from Pretty Fluffy started The 13 Project to show you that one person can make a difference for rescue animals.  The idea is to create anywhere from 1-13 acts of kindness towards animals before 2013. 
 
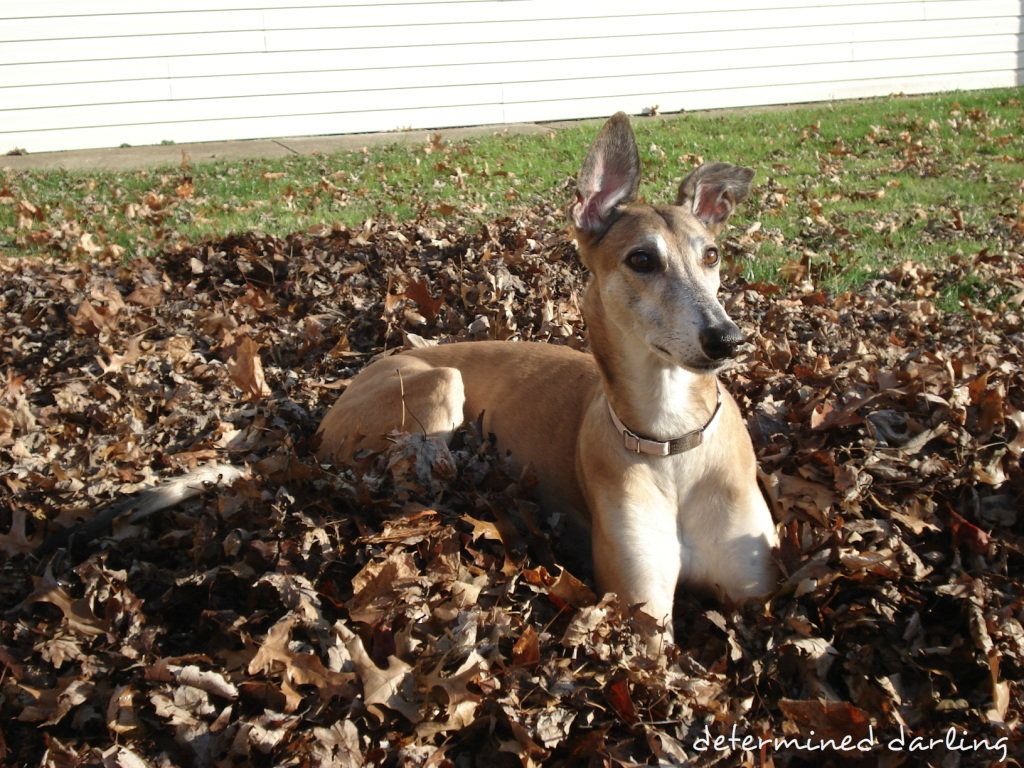
Before we get to my list I want to share our retired racing greyhound, Bow’s, story. 
 
To say that I adore my greyhound, Bow, is a colossal understatement.   I have loved her since the day I first laid eyes on her. I had just graduated with my bachelor’s degree and my hubby, then boyfriend, and I had moved in together and wanted a dog.  After some research we discovered all about retired racing greyhounds, how had I not known about this!
Let me share a little bit about racing greyhounds.  I’ll start by stating that I vehemently oppose greyhound racing. Even if the injuries, lack of care, and violent killings of “old” or “not profitable” greyhounds could stop (and I’m not saying all owner's do this) there is still the problem of greyhound breeding adding to overpopulation and there are WAY too many animals, greyhound or not, waiting for loving homes.  When animals are used for profit and that’s the bottom line, nothing good can come of it.  Greyhounds are truly the sweetest, most awe-inspiring creatures.   They can reach speeds of 45mph, second fastest only to the cheetah, pretty awesome huh?   Most of the time though they love being lazy on a soft, warm bed.  Prior to the 1980s almost all racing greyhounds that were no longer profitable or good for breeding were destroyed.  Today many greyhounds are  still killed after their racing days, however, thanks to the hard work of rescue groups many of them go to loving homes.  There are hundreds of greyhound rescue groups if you’re interested I’m sure there is one nearby.  To learn more about greyhounds and adoption check out The Greyhound Project or feel free to email me with questions!
 
Back to Bow’s Story, we had just learned about retired racing greyhounds and they pulled at our heart strings. I think because we felt like we could relate to them being weird, skinny, runners ourselves.  We found Greyhound Adoption of Ohio a rescue we lived nearby at the time and went to adopt a dog.  We walked into the kennel at the rescue and there she was, the first greyhound we saw, pawing at the crate latch and shoving her whole body up against the crate so we could pet her.  And that was it she had stolen our hearts with those beautiful amber eyes. 
 
The first day we brought her home she took all the toys we bought her one by one to her crate, went inside it, and slept for days.  She didn’t know what toys were or how to play, loud noises scared her, slippery floors were terrifying, and stairs, forget about it! Retired racers have never had to navigate stairs so they don’t know how to use them.  And yes, for the first 3 months I carried all 68 pounds of her  up and down the stairs, ya she’s been spoiled since day one. 
Ever so slowly she began to trust us to realize we weren’t leaving her and that she would always have food, a warm soft bed, and toys!  She became our Bowsy, the quirky, loveable greyhound I know today.  In March of this year she was diagnosed with cancer, had a tumor removed, and chemo.  The wonderful vets at OSU’s vetand greyhound clinic are fabulous! Right now, she still has cancer but she’s happy and pretty much unaffected by the cancer so we keep fighting for a long, happy life for her!
She has changed our lives so much and taught us more about patience and unconditional love than anyone ever could.   We are so lucky she picked us. 
 
Inspired by The 13 Project and my furbaby Bow is my list of acts of animal kindness:
1.)  Donate old blankets and towels to a local shelter.
2.) Volunteer my time at Greyhound Adoption of Ohio, where we adopted Bow.
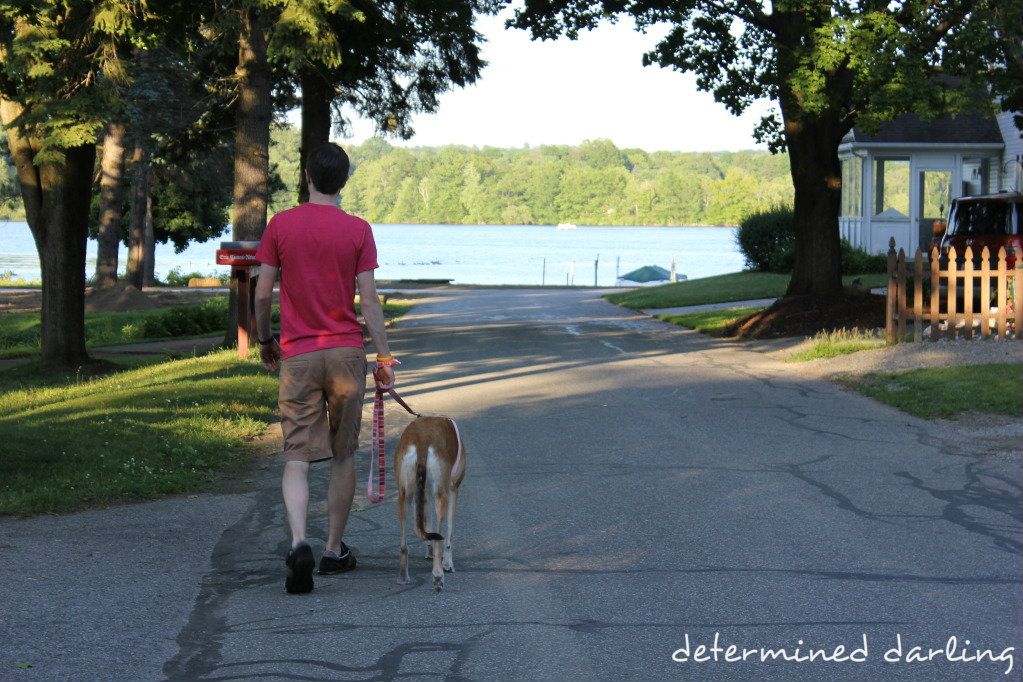
3.) Share Bow’s story and promote adoption.  We always get stopped when walking Bow with questions about greyhounds.  It is a great opportunity to share how wonderful it is to adopt a greyhound!
4.) Volunteer my time for the local Greyhound Adoption Group. 
5.)  Purchase a Greyhound Calendar to benefit Greyhound Adoption of Ohio.
6.) Promote The 13 Project.
7.) Buy an extra can of dog food and put a rescue group’s donation box when I buy Bow’s dog food. 
8.)  Sign this petition (I found from Pretty Fluffy) to help greyhounds from cruel export trade.
9.) Start a “pet pantry” for families struggling to feed their animals.
10.) Purchase this necklace with Bow’s tattoo numbers on it, I can use it to start conversations about greyhound adoption.
11.) Pin on my Adopt and Rescue board to promote adoption. 
12.) Spread the word about adoption and how horrible pet stores/puppy mills are (seriously, people still don’t know!?)
13.) Start making delicious dog treats that I could sell and donate the profits to rescue organizations like Greyhound Adoption of Ohio. 
I won't get all 13 completed by 2013 but I can get a great start and maybe, by this time next year I'll have completed all 13.  I'll keep you updated!
 
Check out The 13 Project and join in the fun!  Whether we do one or thirteen or a hundred acts of animals kindness we are still making a difference!
Photobucket
 
Linking up with:

Friday, October 12, 2012

Squash and Potatoes Au Gratin

 
I have a confession …I really don’t like butternut squash that much…gasp (I know) this is fall blasphemy! What can I say I love savory food and I’ve always disliked the sweetness in butternut squash.  It’s the same with sweet potatoes and pumpkins but I’m determined to make delicious dishes with these ingredients.  I even made a savory pumpkin soup I’ll share the recipe next week. 
For now, back to the squash!

 
We got our first butternut squash of the season in our CSA basket and we also happened to get a bag full of potatoes.  Then it popped into my head au gratin is the answer.  It turns out au gratin isn’t all that healthy or vegan, shocking (note the sarcasm.)  I searched around for a healthier more vegan friendly way to make it and found The Scrumptious Pumpkin who used cauliflower as a base to make her au gratin.  Awesome! I used a base of cauliflower along with garlic, paprika, garlic powder, onion powder, salt, pepper, and a little liquid (reserved liquid from cooking the cauliflower) to make my au gratin. 


I did use organic cheese at the end to create the yummy crust, however, if you want to make it vegan just add ¼ cup nutritional yeast to the cauliflower base and gluten free breadcrumbs drizzled with olive oil as the crust.  This would also be delicious!!
Butternut Squash and Potato Au gratin
Gluten Free, Vegetarian, Vegan Option, Egg Free, Soy Free, Dairy Free Option
1 large butternut squash sliced thin
6 medium potatoes sliced thin
1 large head cauliflower
2 cloves garlic
¼ tsp garlic powder
¼ tsp onion powder
¼ tsp sweet Hungarian paprika
¾ cup reserved cauliflower liquid
Salt and pepper to taste
2 cups grated sharp cheddar cheese
¼ cup chopped chives for topping
Directions
1.      Preheat oven to 400 F
2.      Clean and Roughly Chop Cauliflower, add to a large pot of boiling water and cook for about 15 minutes or until very tender.
3.      Meanwhile wash the potatoes and squash and thinly slice.  I used the large slicer on my food processor since I had so much to slice.  It was the perfect size; you could also easily do this by hand it would just take longer.  Set aside.
4.      Once cauliflower is very tender, drain. Reserve about a cup of the liquid. Allow to cool for a few minutes.
5.      Place the cauliflower in a food processor along with garlic, paprika, garlic powder, onion powder, salt, pepper and ½ cup reserved liquid.  (If you are making this dish vegan add the ¼ cup nutritional yeast now)
6.      Process until smooth then continue adding the remaining reserve liquid until the mixture is smooth and creamy.  (I used about ¾ cup liquid)
7.      Add half of the potatoes and squash to a 9 x 13 baking dish and cover with half the cauliflower sauce.  Repeat the process with the rest of the potatoes, squash, and sauce.  Make sure all the potatoes and squash are covered in the sauce. 
8.      Cover with foil and bake for about 35 minutes.
9.      Remove foil and bake for another 20 or until the potatoes are tender. ( If going vegan add the gluten free breadcrumbs and evoo before baking uncovered)
10.  Remove the dish and cover with grated cheese.
11.  Broil for a few minutes until the cheese is bubbly and lightly browned.
12.  Top with chives and serve!
** This dish is garlicky, if you don’t like that reduce the amount of garlic/garlic powder.


My husband loves all kinds of veggie dishes but the way to his heart is potatoes and cheese …needless to say he loved this dish.  We may even make it for Thanksgiving!  If you make this and try the vegan version let me know how it turns out!!

Check out all the recipes from "winter squash week!" Rice & Mushroom Stuffed Acorn Squash here and then, Rosemary Roasted Butternut Squash Seeds here
Do you have the same semi-aversion to sweeter squashes and sweet potatoes like I do or do you think I’m nuts?
 
Photobucket
 
Linking up with

Wednesday, October 10, 2012

Rosemary Roasted Squash Seeds

 
 “Use it up, Wear it out, Make it do, or Do without”   
I love this old wartime saying and find myself thinking it a lot when I’m cooking.  I hate waste, especially food waste.  Did you know American households throw out an average of 470 pounds of food a year! Yikes!!! That is way too much food going in the trash.  When I look at a food item I try and think of how I can use up every bit. Whatever I can’t use goes into the compost and then onto the garden to grow more food!  
This brings us to winter squash seeds, don’t throw them out.  Besides creating food waste your tastes buds will majorly miss out if you throw these little gems away. 
 You can use any winter squash seeds, not just pumpkin, and any spices you like.   I loooove roasted rosemary, it smells and tastes amazing. 
Rosemary Roasted Squash Seeds
Squash Seeds
Drizzle of extra virgin olive oil
1 tsp Rosemary
Pinch of cayenne (more if you like the heat)
Salt & Pepper to taste
1.)    Preheat oven to 300 degrees F
2.)    Scoop all the seeds out of the squash. TIP: Use a grapefruit spoon. 
3.)    Pick all the seeds out of the stringy goo that is attached to them, lightly rinse with water, pat dry, and place in a small bowl.
4.)    Cover seeds lightly with extra virgin olive oil.
5.)    Sprinkle rosemary, cayenne, salt, and pepper onto seeds and stir to coat.
6.)    Spread out on a cookie sheet and bake at 300 F for 10 minutes or until seeds are lightly browned.
I cooked up a Rice & Mushroom Stuffed Acorn Squash earlier this week check that recipe out here. The seeds are delicious for roasting.  
What is your favorite way to top roasted squash seeds?  Do you favor one roasted squash seed over another? (I’m pretty smitten with roasted butternut squash seeds.)
Photobucket
 
Linking up with

Monday, October 8, 2012

Rice & Mushroom Stuffed Acorn Squash

 
I love fall, the crisp air, the smell of leaves, and all the delicious harvest food.  Nothing says fall like the winter squash harvest.  Winter squash has been popping up in our CSA basket for the last couple weeks and I have been whipping it up into as many recipes as I can think of.  I adore eating seasonally and winter squash provides the hearty and warm dishes I’m craving now that the weather has turned cold. 
This week I have a few squash filled recipes to share! We’ll kick off “winter squash week” with the lovely acorn squash.  A ridged (usually) dark green squash (they can be tan or yellow) with sweet yellow-orange flesh and a good source of vitamin C, A, and B6.  I find their round shape makes them the perfect squash to stuff.  (And save the seeds they are delicious to roast, recipe coming this later week)
I stuffed the squash with a vegetable rice mixture that got deliciously crunchy as it baked in the oven. 
 
It was so delicious I took the leftover stuffing (for one squash you will have extra) and baked it in oven to give it that delicious crunch…leftovers.were.amazing!
 
The main dish was just as amazing with that soft but crunchy rice mixture inside the baked squash. YUM.

Rice & Mushroom Stuffed Acorn Squash
Gluten free, Vegan, Vegetarian, Dairy Free, Egg Free
1 acorn squash (although the stuffing could fill 2 if you wanted)
2 cups cooked brown rice
1 onion diced
1 mild pepper diced
2 large carrots diced
8-10 ounces mushrooms quartered
1 tablespoon Bragg Liquid Aminos (or gluten-free soy sauce)
1 tablespoon (soy free) Earth Balance (or butter) (plus a little more for topping)
1 teaspoon red pepper flakes
 About 1.5 tablespoons EVOO
Salt and pepper to taste
 
Directions:
1.)    Preheat oven to 375 degrees F
2.)    Cut squash in half and remove seeds – save them for roasting check out my recipe here!
3.)    Put the squash in a baking dish, face up, lightly rub with EVOO place in the oven and bake for 25 minutes
4.)    While the squash is baking heat 1 tablespoon of oil in a large skillet over medium heat
5.)    Add the onion, carrot and red pepper flakes and saute until golden, about 5 minutes
6.)    Add the pepper and mushrooms, cover and cook until tender, about 10 minutes
7.)    Stir cooked rice, Bragg, and Earth Balance into the pan and heat for about 3 minutes
8.)    Remove squash from oven and spoon rice mixture into the squash
9.)    Top each squash half with a small amount of Earth Balance
10.) Bake at 375 F for 30 more minutes or until the squash is tender
       ENJOY!!!
 
TIP: If you use one squash you will have left over rice mixture and it is fine to eat the way it is.  However, if you want to make it really delicious put it in a baking dish topped with a little Earth Balance and bake along with the squash for about 20 minutes.  It will be soft, hot, and a little bit crunchy soooooo good.
Do you love all the winter squash available this time of year?  What’s your favorite squash dish?
Check out the second recipe of Squash Week for my Rosemary Roasted Squash seeds here!!
 
Photobucket
 
 
Linking up with:

Monday, October 1, 2012

Just a Potato

Just a potato, no this is not just a potato; this is a little bit of baked heaven in your mouth.  Simple, easy, and freakin’ delicious. 
 
 
The weather is chilly and I can smell fall in the air.  I love fall!! Fall is not thought of as “grilling weather” but, it is a great time to grill! There is nothing like the flavor of grilled food.  We actually made these potatoes early in the summer from our first CSA potatoes, but seeing these pictures makes me think we’ll be firing up the grill tonight!  You could also do these potatoes in the oven and they would still be delicious! The grill just adds an extra lil sumin’ sumin’. 
 
This recipe can’t get easier potatoes, olive oil, and spices.

 
For the spices I used salt, pepper, and Simply Organic Garlic ‘n Herb. 
I don’t often use premade spice mixes but I love this one! It adds great flavor to all the dishes I’ve used it in {and I’m not being paid or perked to say that.}  It has a mix of sesame seeds, garlic, black pepper, lemon peel, onion, and parsley.  The sesame seeds and lemon peel make a great crust on the potatoes.
 
 Everything I have researched indicates this mix is gluten free! It is not certified gluten free, but, Frontier {who make Simply Organic} states HERE that they have eliminated all products and ingredients containing gluten and ensure any new products do not contain gluten.
The potatoes get wrapped all up in foil and grilled on indirect heat for about 50 minutes.                   De-freakin-licious!!


Heaven Grilled Baked Potatoes
Potatoes {Yukon Gold}  
Olive Oil – enough to lightly cover each potato
Salt- to cover lightly
Pepper – to cover lightly
½ tsp Simply Organic Garlic ‘n Herb - per potato
Aluminum Foil
Directions
1.)    Wash and scrub potatoes. Place each potato on a piece of aluminum foil large enough to wrap and cover the whole potato. 
2.)    Drizzle olive oil on and rub to cover the entire potato. 
3.)    Sprinkle salt, pepper, and herbs on the potato and rub to cover the entire potato. 
4.)    Wrap the potato up in foil. 
5.)    Place the potatoes on indirect heat on the grill.  {TIP: We used the top rack of our grill and turned the flame on the opposite side of the grill.}
6.)    Grill for about 50 minutes, flipping the foiled potatoes half way through. 
7.)    Spilt the potatoes and top with a dab of Earth Balance {or butter.}  

 Enjoy this deliciously simple side!
 
 
What's your favorite grilled veggie recipe?  Do you grill into the cold winter months or just in the summer?  Or are you lucky enough to have warm weather to grill all year long?
 
Photobucket
 
Linking up with